Looking for a way to add custom date ranges to your worksheet or dashboard? For requirements like “Last 7 Days”, “Previous 30 Days”, and “Last 60 Days” this is your ticket. (With some modifications “Last Quarter” and “Prior Year” are also possible). As a Tableau amateur I was having a tough time wrapping my head around this one. A little Google-Fu brought me to the post “Custom date ranges using Parameter Controls” which had just enough information to get me started.

It turns out one parameter and one calculated field are all you need. Check it out:
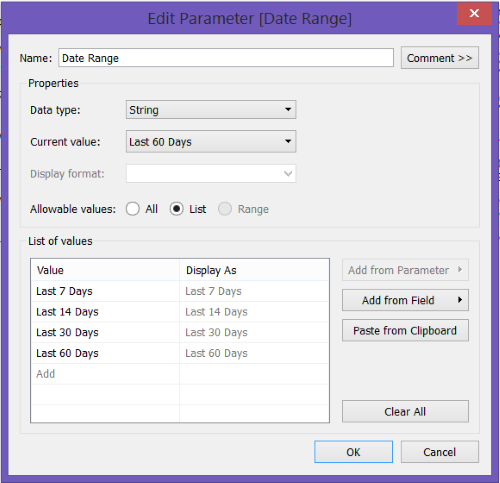
Create The Parameter
- Create a new parameter and name it “Date Range”
- Set the Data type to “String”
- Set allowable values to “List”
- Add the following items:
Last 7 Days
Last 14 Days
Last 30 Days
Last 60 Days - Click “OK”.
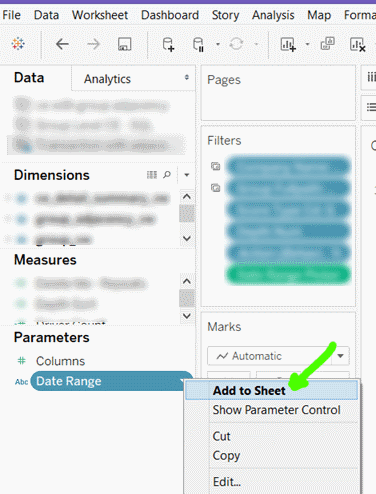
- Right click on the “Date Range” parameter and select “Show Parameter Control”.
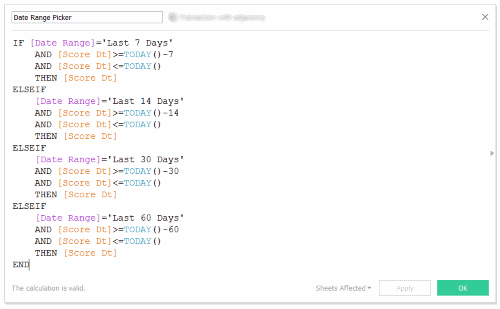
Create The Calculated Field
- Create a new calculated field and name it “Date Range Picker”.
- Add the following code to the calculated field:
 IF [Date Range]='Last 7 Days'
    AND [Score Dt]>=TODAY()-7
    AND [Score Dt]<=TODAY()
    THEN [Score Dt]
ELSEIF
    [Date Range]='Last 14 Days'
    AND [Score Dt]>=TODAY()-14
    AND [Score Dt]<=TODAY()
    THEN [Score Dt]
ELSEIF
    [Date Range]='Last 30 Days'
    AND [Score Dt]>=TODAY()-30
    AND [Score Dt]<=TODAY()
    THEN [Score Dt]
ELSEIF
    [Date Range]='Last 60 Days'
    AND [Score Dt]>=TODAY()-60
    AND [Score Dt]<=TODAY()
    THEN [Score Dt]
END
- Replace [Score Dt] with the date dimension from your data source.
- Click “OK”
Add The Filter
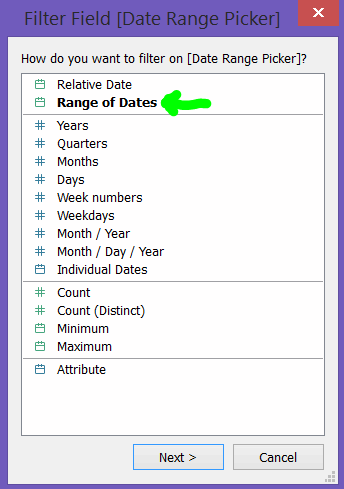
- Drag the calculated field “Date Range Picker” into your Filters.
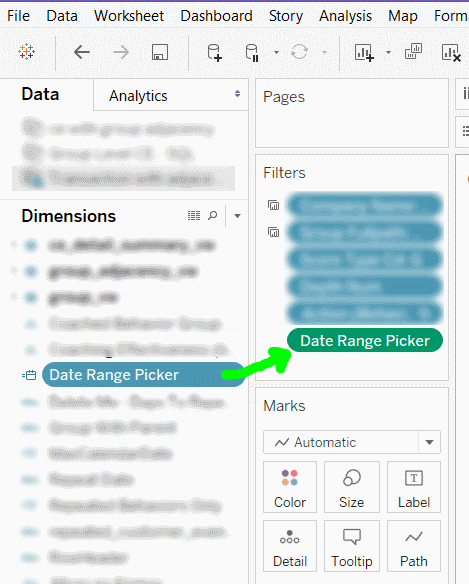
- The Filter Field dialog box will appear. Select “Range of Dates”.
- Click “Next”.
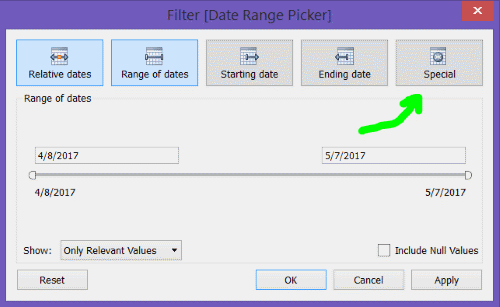
- Select “Special” from the Filter dialog box.
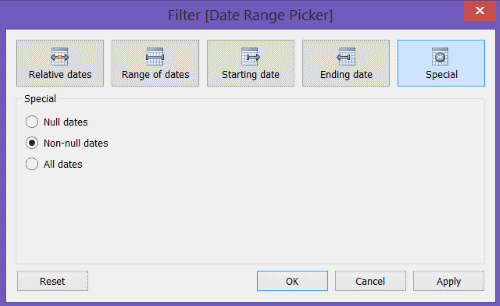
- Select “Non-null dates”.
- Click “OK”
That’s it! You’re a hero!